
How to Migrate Office PCs to Cloud Desktops: A Step-by-Step Checklist
-
 13 August 2026
-
 Cloud Desktop,Virtual Desktop
 -
 Written by
Editorial Team
Written by
Editorial Team
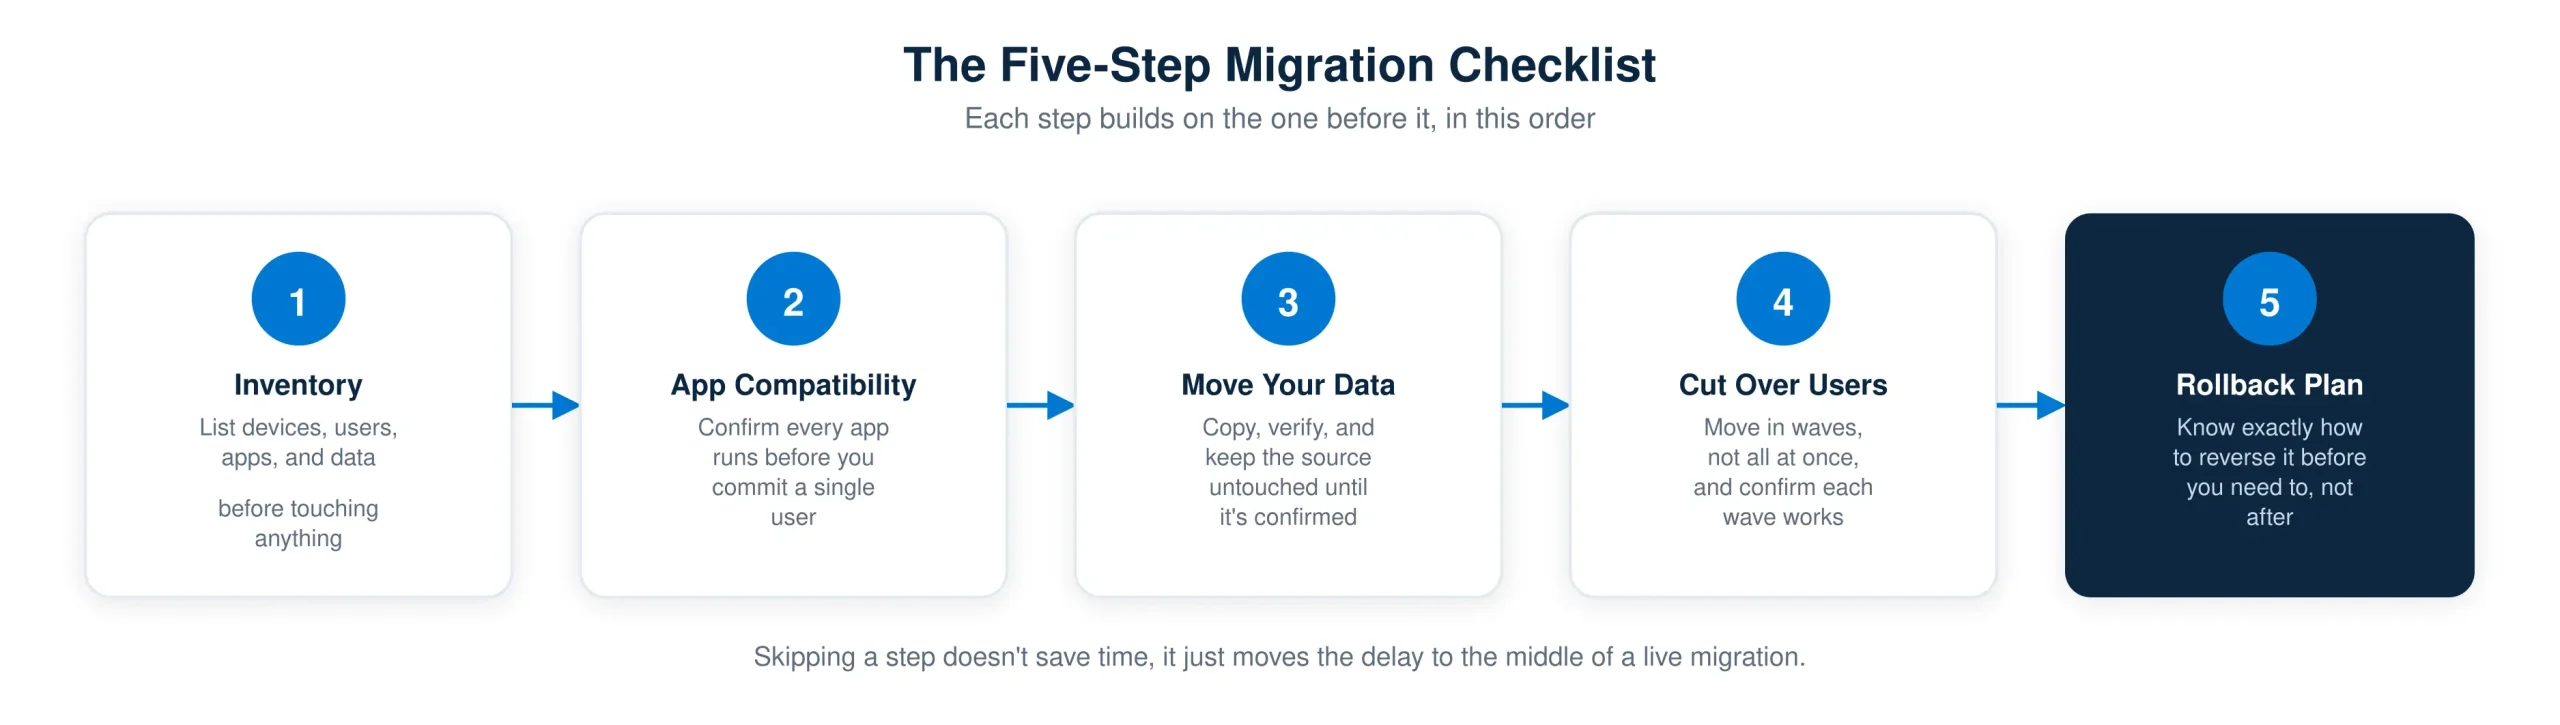
Migrating office PCs to cloud desktops comes down to five steps done in order: inventory what you have, confirm your applications will actually work, move the data, cut users over in controlled waves, and have a rollback plan ready before you need one. Skip a step and it doesn’t disappear, it just resurfaces in the middle of a live migration when it’s harder and more disruptive to fix. This checklist walks through each step with the specific things to check at every stage, so you can follow along during your own migration rather than reading a case study after the fact.
What You Need Before You Start
Before touching a single machine, get these three things settled. They are not part of the five-step checklist itself, but skipping them is the most common reason migrations run longer than planned.
- A named point of contact for each department. Someone who knows what their team actually uses day to day, not just what’s on the official software list. Shadow IT, spreadsheets with macros nobody documented, a single PC running a scanner nobody remembers configuring, surfaces here.
- A maintenance window that doesn’t touch a deadline. Payroll week, month-end close, or a filing deadline is the wrong week to cut anyone over, even if the technical work is ready.
- A decision on scope. Are you moving every PC at once, or migrating department by department? Almost every successful migration in an organization over 15 people goes department by department. It’s slower start to finish, but each wave surfaces problems while the blast radius is still small.
It’s also worth deciding upfront whether this is a self-managed migration or one you’re bringing in outside support for. Neither choice changes the five steps below, they apply either way, but it changes who owns each one and how much internal IT time gets consumed over the following weeks.
Step 1: Inventory Your Current Environment
You cannot plan a migration around a system you haven’t actually counted. This step is tedious and it’s also the one most teams try to shortcut, which is exactly why it causes the most mid-migration surprises.
- List every physical PC, its age, and its current specs. Machines close to end of life don’t need to be preserved in the new environment, they need to be retired.
- List every user and which PC or PCs they use. Shared workstations and multi-shift setups need different handling than one-user-one-machine environments.
- List every application in active use, not just what’s on the official IT asset list. Walk the floor or send a short survey. This is where shadow IT and forgotten line-of-business tools show up.
- List where data actually lives. Local drives, shared network folders, and cloud storage that’s already in use all need separate handling in step three.
- Note any peripherals that depend on a specific machine: label printers, receipt printers, scanners, or specialized USB hardware. These are the most common source of “it worked yesterday” complaints after cutover.
The output of this step should be a single spreadsheet: one row per user, columns for their current machine, their applications, their data locations, and any hardware dependencies. Everything else in this checklist references back to that sheet.
Most teams underestimate how long this step takes, not because it’s technically hard, but because getting an accurate answer means asking people rather than reading an asset management tool. Asset lists tell you what’s officially deployed. They rarely tell you about the spreadsheet with fifteen years of macros that one person in finance depends on, and that gap is exactly what causes the “we didn’t know about that” moment mid-migration.
Step 2: Check Application Compatibility
This is the step that determines whether the rest of the migration is straightforward or difficult. Most business applications run fine on a cloud desktop. The exceptions are specific enough to be worth checking individually rather than assuming.
- Standard business software: Microsoft 365 apps, common line-of-business software, and browser-based tools generally migrate without issue.
- Accounting and tax software: Multi-user desktop applications like QuickBooks Desktop need specific configuration for concurrent access in a hosted environment. If your team already runs QuickBooks in a multi-user Windows Server setup, that experience carries over directly.
- Software tied to a physical dongle or license key. These need advance planning, since a hardware dongle doesn’t attach to a virtual session the way it does to a physical PC. Some vendors offer software-based licensing alternatives; check before migration day, not during it.
- Graphics-intensive applications: CAD, video editing, and 3D rendering tools need a GPU-backed environment to perform acceptably. A standard virtual desktop will run them, but slowly enough that users will notice immediately.
- Anything requiring direct hardware access: specialized lab equipment, certain manufacturing software, or audio interfaces used for latency-sensitive work are the genuine edge cases where a cloud desktop isn’t the right fit for that specific workstation, even if it’s right for everyone else in the building.
Test each flagged application in a pilot environment with two or three actual users from that department before committing the full team. A five-minute test by someone who uses the software every day catches problems that an IT checklist alone won’t.
The reason this step exists as its own checklist item, rather than being folded into inventory, is that compatibility issues are the single most common cause of a migration timeline slipping. Discovering in step four that a critical piece of software doesn’t behave correctly means unwinding cutover work that’s already been done, which costs far more time than testing it here would have.
Step 3: Move Your Data
Data migration is where the sequencing matters most. The goal is to copy and verify before anyone’s daily workflow depends on the new location, not after.
- Copy data to the new environment while leaving the original source untouched and read-only during the transfer. Never migrate directly from a live, actively-changing source.
- Verify file counts and spot-check folder structures against the source before declaring the copy complete. A file count mismatch is easier to catch now than after a user has already started working from the new location and can’t find something.
- Handle local-only files separately from shared network data. Anything that only ever lived on someone’s C: drive needs to be identified during the inventory step and explicitly included here, or it gets missed entirely.
- Set a cutoff time for the last sync before cutover, and communicate it clearly. Any file saved locally after that cutoff on the old machine won’t be in the new environment automatically.
- Keep the original data intact and accessible, read-only, for at least 30 days after cutover. This is your safety net if something surfaces later that wasn’t caught during verification.
Data migration is also where the choice between a self-managed desktop as a service environment and a fully in-house build shows up most clearly. A managed provider typically has migration tooling and a tested process for exactly this step, which is often the difference between a weekend project and a multi-week one for a team handling it for the first time.
Step 4: Cut Over Users
Cutover is the step users actually experience, so it’s worth doing in controlled waves rather than as a single event, even for smaller teams.
- Move one department or one small group first, ideally the group most comfortable with change, not the group most resistant to it. Their feedback shapes how the rest of the rollout goes.
- Give each user their login credentials and a short walkthrough before their cutover day, not on it. A five-minute demo the day before prevents most day-one confusion.
- Keep the old physical PC powered on and accessible, but not the default login, for the first few days after each user’s cutover. This gives them a fallback without undermining the migration itself.
- Check in with each wave specifically 24 hours after cutover, not just at the end of the week. Problems that show up on day one are usually configuration issues; problems that show up later are usually workflow issues, and they need different responses.
- Don’t start the next wave until the current one is confirmed stable. Rushing overlapping waves is the most common way a manageable migration turns into a chaotic one.
Teams running this over hosted remote desktop infrastructure generally find cutover the least disruptive step of the five, since the environment users are moving into is already fully configured and tested by the time any individual user logs in for the first time.
Step 5: Build a Rollback Plan
A rollback plan is not a sign the migration is expected to fail. It’s the difference between a bad afternoon and a bad week if something does go wrong. Build this before cutover starts, not after something breaks.
- Define specifically what triggers a rollback decision for an individual user versus an entire wave. A single user’s printer not working is not a rollback trigger. A core application failing for an entire department is.
- Keep original physical PCs functional and untouched, not repurposed or wiped, until the entire migration is confirmed stable, typically 30 days past the last wave’s cutover.
- Document exactly how to revert a single user to their old PC: what needs to happen, who does it, and how long it takes. If this isn’t written down in advance, it gets figured out live, under pressure, which is when mistakes happen.
- Assign one person as the decision-maker for rollback calls during the migration window. Ambiguity about who decides is what turns a fixable problem into a stalled migration.
Most rollback plans never get used. That is the point of building one, not a sign it was unnecessary work. The plans that do get used are the ones written down in advance, because the version improvised during an actual incident is almost always worse than the version thought through calmly beforehand.
How Long Does This Actually Take
Timelines depend far more on team size and application complexity than on the technology itself. As a realistic range, not a promise: a 10-person team with standard business software typically completes all five steps in 1 to 2 weeks. A 25-person team, especially with multiple departments and a few flagged applications to test, usually runs 2 to 4 weeks. A 50-person team with mixed departments, some specialized software, and a phased cutover across several waves often takes 4 to 6 weeks start to finish.
Inventory and application compatibility testing (steps 1 and 2) typically consume close to half the total timeline, even though they involve the least amount of actual data movement. That is expected, not a sign something is going wrong. The steps that look the least active on a project tracker are usually the ones preventing the most disruption later.
The Full Checklist at a Glance
A condensed version of everything above, for printing or pasting into your own project tracker.
- Assign a department contact, pick a maintenance window, and decide your migration scope
- Inventory every PC, user, application, and data location
- Test flagged applications with real users in a pilot environment
- Copy and verify data with the source left read-only
- Set and communicate a final sync cutoff before cutover
- Cut over users in waves, starting with the most change-ready group
- Check in 24 hours after each wave, not just at week’s end
- Keep old PCs functional and untouched for 30 days post-cutover
- Document rollback triggers and assign one rollback decision-maker
Frequently Asked Questions
-
Can I migrate to a cloud desktop without downtime?
Yes, if you cut over in waves rather than all at once. Each user’s data is copied and verified before their cutover, and their original PC stays available as a fallback during the transition, so individual downtime is typically limited to the time it takes to log into the new environment.
-
What happens to data on the old PCs after migration?
Keep original PCs powered on, untouched, and accessible in read-only fashion for at least 30 days after each user’s cutover. This is the rollback safety net described in step five, and it should not be shortened just because the migration appears to be going smoothly.
-
Do all applications work on a cloud desktop?
Most standard business software does. The exceptions are applications tied to a physical hardware dongle, software requiring direct hardware access, and graphics-intensive programs that need a GPU-backed environment rather than a standard virtual desktop. Testing flagged applications with real users in step two catches these before they become a cutover-day problem.
-
Should I migrate everyone at once or in phases?
Phases. Migrating department by department, or in small groups within a department, keeps the blast radius small if something unexpected surfaces. It takes longer end to end than a single cutover event, but it is the approach that consistently produces fewer disruptions per user migrated.
-
How do I handle software tied to a physical license dongle?
Check with the software vendor before migration day, not during it. Some vendors offer a software-based or cloud licensing alternative to a physical dongle, which resolves the issue entirely. Where no alternative exists, that specific workstation may need to stay physical rather than move to a virtual desktop, which is worth identifying during the application compatibility step rather than discovering at cutover.
If your team is weighing whether to run this migration yourselves or bring in support that has done it before, the cost and complexity usually come down to how many of these steps you can realistically staff internally. For organizations still deciding whether a self-managed or fully managed environment makes more sense, our breakdown of virtual desktop pricing lays out what each option actually costs, and our guide to what VDI is and how it works is a good starting point if any of the terminology above is unfamiliar.
Planning a migration and want a second set of eyes on the plan?
Apps4Rent can review your inventory, flag likely compatibility issues before they surface mid-migration, and run the phased cutover for you. No obligation.