Getting Started with SharePoint Designer: Part 1
In our series, getting started with SharePoint, we are going through quick tutorials on dealing exclusively with Windows SharePoint Services 3.0. The pinch, however, is that you are limited to the templates and design options that are available with SharePoint.
For those that wish to adventure into designing their own SharePoint site, there is SharePoint Designer, which is available as a free download at Microsoft’s main SharePoint page. SharePoint designer works with your SharePoint site to provide virtually unlimited design options. Before we can do that, however, we have to get things set up. We are going to walk through setting up SharePoint Designer with your hosted SharePoint site and get into designing your dream.
The first thing we need to do is download SharePoint Designer from here . You will have to register for the free download, and if you have a LiveID or Hotmail account, you can use that for your registration.
After we have the program, the next step is to install it. You will find that this part is extremely easy. Even on my Vista laptop, it was about a 3-click install using the default settings.
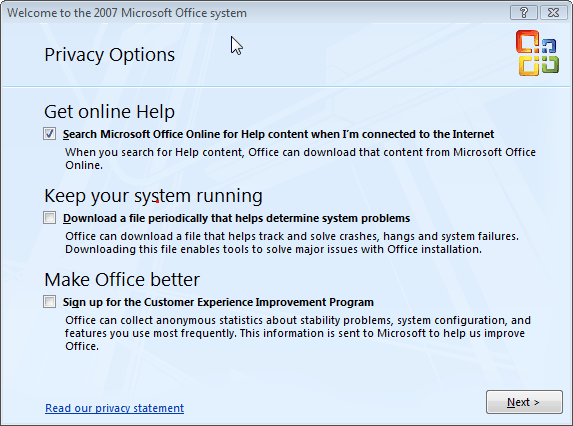
The first time you run SharePoint Designer you will be presented with options for online Help, system maintenance, and the Customer Experience Improvement program. Again, I chose the defaults, leaving a checkmark in just “online Help”.

Then you get to choose if you want to use Windows Update for this product. I highly recommend that you keep your software up to date.
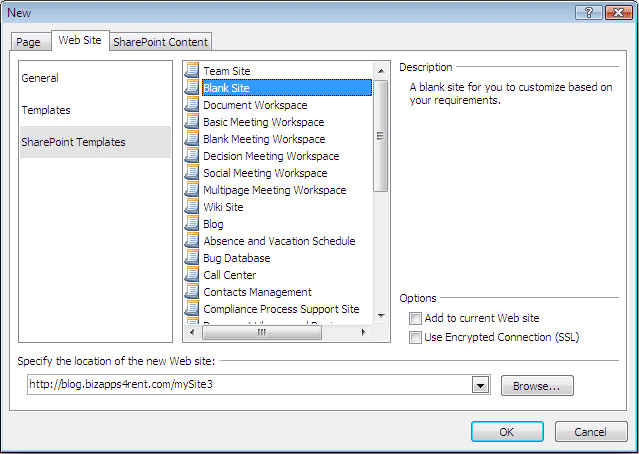
To get started with a new site and to hook up to our hosted SharePoint, we are going to go to “File” and select “new”, and then “Web Site”. On the dialog that pops up, we have a choice of General or SharePoint Templates to choose from. No doubt, you noticed the Templates section. Before you object, check it out; you will find it empty.
The templates in the General section are blank basic sites. SharePoint’s dynamic content capabilities are not built into these sites, but can be added later. This is a good option if you want to build a site from scratch.
On the other hand, the SharePoint templates are based on ASP.NET technology. This can be leveraged to deliver powerful, dynamic, two-way applications that truly involve the users.
You also have the option of using the Import Site Wizard, which lets you create new sites by importing files from a folder on your P.C. or from an existing website. You can’t use this to move dynamic SharePoint components, though, so you can’t import an existing SharePoint site.
For this exercise, we are going to create a site from a template provided by SharePoint.
At the bottom of the dialog window, you will see a place to specify the location of the site. All we have to do to interact with our hosted SharePoint site with SharePoint Designer is put our new site’s URL in that spot. Let’s go ahead and do that, then make sure that “SharePoint templates” is highlighted and click “OK”.

Another dialog box will require your SharePoint login information. Enter your username and password and click “OK”. The dialog box will populate with SharePoint templates. The templates run from a blog site to inventory tracking or knowledge base, but today we are going to choose “Blank Site” and click “OK”.
SharePoint designer will create all the basic files and folders for a basic ASP.NET site, and give you the directory. You have now created a blank ASP.NET ready web site. Feel free to navigate to your new site in your favorite browser to check out your handiwork! Now sign up with Apps4Rent for SharePoint 2013 server hosting solutions.


